Pre-Installation Recommendations
It’s the customers responsibility to ensure that all new-builds or newly plastered rooms have been left to environmentally stabilise prior to the installation of new kitchen doors. Kitchen doors must not be installed into a damp or moisture-rich environment as it will cause undesirable movement in the joints and panels of the door.
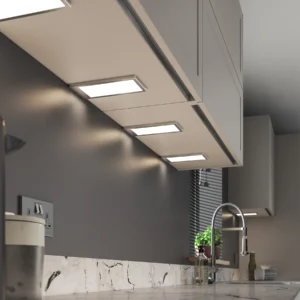
Light
Timber changes colour when it is exposed to light. The species of timber and intensity of exposure will affect the rate of change. Due to this we recommend that timber samples displayed in showrooms be changed regularly. It is advised that colour change is also taken into consideration when fitting new or replacement doors to an existing kitchen some time after the original kitchen was installed.
Cleaning
- do not use wax-furniture polish, abrasive or aggressive cleaners, bleach or other hypochlorite (chlorine) based cleaners, multipurpose cleaners, dilutes, acetone, alcohol, solvent or similar products on any door, as this will damage the surface;
- only use a 5% soap, 95% water (liquid soap) solution, wiping with a damp (not wet) cloth, finally drying with a soft clean cloth only.
- ensure all cooking splashes are wiped immediately with a damp cloth;
- dust with a soft cloth only.
Moisture
Excess moisture can damage a timber product, it is recommended that susceptible areas such as around the sink are thoroughly maintained and kept dry at all times.
Kitchen frontals are designed for domestic use. We recommend that each area / cabinet in the kitchen is maintained within domestic temperature and humidity levels. We recommend a temperature range of 16C – 24C and a relative humidity range of 40% to 60%.
Integrated Dishwasher Doors
Do not open dishwasher doors mid cycle or immediately at the end of a cycle. Excess steam can cause damage not covered by warranty”. This advice is aimed at preventing hot steam from damaging surrounding kitchen cabinets or countertops, especially with integrated dishwashers.
General Best Practices
- Wait Briefly (10-30 minutes): Wait a few minutes (around 10-30 is a good rule of thumb) after the cycle finishes to let the steam subside and the dishes and interior cool down. This prevents you from being burned by a rush of hot steam and reduces the risk of thermal shock to delicate glassware.
- For Overnight: If you run the dishwasher overnight, you can leave the door slightly open in the morning to air dry completely.
- Check Your Model: Some modern dishwashers have a feature that automatically opens the door slightly at the end of the cycle to aid drying. Always check your specific dishwasher’s manual for manufacturer-specific advice.
Installation Advice
Pre Installation
It’s the customers responsibility to ensure that all new-builds or newly plastered rooms have been left to environmentally stabilise prior to the installation of new kitchen doors. Kitchen doors must not be installed into a damp, or moisture-rich environment as it will cause undesirable movement in the joints and panels of the door. A hygrometer should be used to assess conditions.
To help minimise any potential damage to the kitchen whilst you are installing it, please read and adhere to the following instructions and recommendations:
- We would advise that you make an initial check to confirm that you have the correct quantity and sizes of fascia’s; you can do this by referring to the labels attached to the outer packaging.
- The fascia’s should be stored flat and away from the working area. Take extreme care when stacking the fascia’s with hinges attached to ensure that the hinges do not mark other fascia’s. Do not lean the fascia’s against one another, or against any surface without proper protection in-between.
- Ensure that you fully inspect each individual fascia prior to attaching the hinges. Claims for damage to the fascia will not be accepted after the hinges have been attached.
- Take extreme care when unpacking the fascia’s and do not use sharp blades to cut away the packaging.
- When attaching the hinges, place the fascia face down on a soft clean surface, ensuring that there is no grit, sawdust or other matter underneath that could damage the surface of the fascia whilst the hinges are attached. It is good practice to place a sheet of clean cardboard between the fascia and the flat surface prior to attaching the hinges.
- If the hinges are ‘knock-in’ type, use a rubber mallet to knock the hinges into the fascia without using excessive force.
- Once the hinges have been attached to a door, hang the door on the unit straight away to avoid damage. Do not stack the doors with the hinges touching other doors, as this can cause scratches or marks
to the other fascia’s. - Do not stack the doors on their ends on any hard surface; this can cause chipping and scratching along the edge of the fascia, especially on the handle edge of ranges with an integral handle. Prior to fitting, the fascia’s should be stored flat, ensuring that they are not resting on any dirt or debris that may damage or mark the finish.
- You should take extreme care not to put the door down with excessive force on any edge, especially the handle edge, as this will cause crushing/impact damage on these edges.
• Take extreme care not to put the door down on any hard or rough surface such as bare concrete floors, or on any debris such as sawdust, grit or screws, as this can damage the product.
• If the fascia’s are attached to the carcass, then you should carefully remove the fascia’s by unclipping the hinges, and storing these flat in a clean safe environment away from your working area, utilising the packing materials from the units.
• Where cutting/scribing décor panels and trim, you must use a sharp quality saw blade of the appropriate grade for fine-cutting, or a suitable router. Small chips can appear along the cut-edge, and so extra care must be taken to minimise the risk of chipping. Using a blunt or inappropriate saw blade will produce a poor finish, and this will not be covered by the guarantee.
• On Painted Products: Any fine chips along the cut edge should be smoothed with a fine grade sand paper prior to fitting.
• All cut edges should be sealed against moisture ingress using a suitable water resistant sealant/adhesive prior to installation.
• All trims are supplied in long lengths and need to be cut down on site, and again it is important that this is done using the appropriate tools.
• When fitting the plinth, ensure that you check the dimensions of any adjacent appliances. On occasion, the plinth may need to be pulled forward to ensure that it clears the front of the appliance.